Woocommerce Plugin Documentation

Dropshipping Plugin Documentation Version 1.0.4
Welcome to the Dropshirt Woocommece Dashboard. A place where you connect your products directly to our production house. Your store connects directly with a t-shirt printing workspace at one of our production houses. The application offers a simple system for Australian Woocommerce users to get an effective t shirt fulfilment service at wholesale prices.
To use the application you will need the following.
1. A Customer Number from our Production House - Apply for an account here
2. A Wooommerce Plugin API Key - Comes with an account - Apply here
3. At least one product added to your Woocommerce store - Learn about adding Products here
What the App can do for you
The Dropshirt Woocommerce plugin connects your products to our production house. When your customer orders a product (connected to the Dropshirt Plugin) from your Woocommerce store, the order will show up at a t-shirt print house marked pending your approval. The Woo Dashboard then provides a simple - one click approval process and push to production line - all in one button.
What the App can NOT do for you
It will NOT build you a website or an online business. This App does NOT create products for you. It simply connects your Woocommerce products to our production house.
How to use our WooCommerce drop shipping plug-in
Go Here and Download the Plugin (dropshipping.zip)
Then complete the following steps inside WordPress
1. Click “Plugins”
2. Click “Add New”
3. Click “Upload Plugin”
4. Browse for the location of the (dropshipping.zip)
5. Click “Install Now”
6. When the plugin is installed - Click “Activate the Plugin”
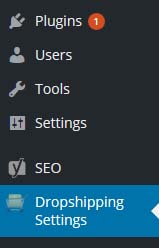
2. Complete the "Dropshipping Settings" page
Once your plugin is installed, you will see on the left hand column is your setting tab. Click “Dropshipping Settings” and you will be taken to the settings page.
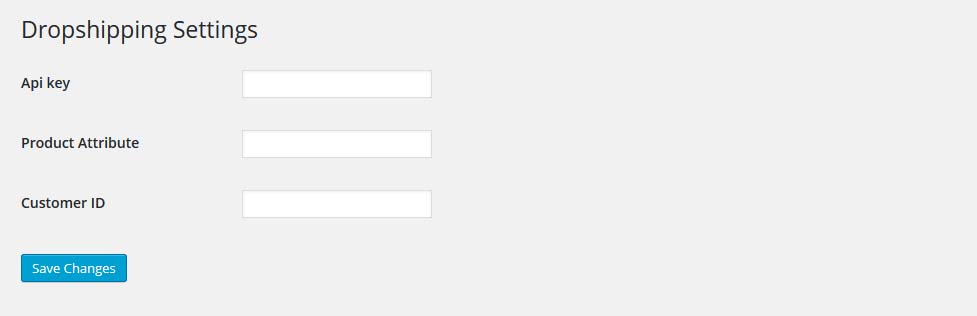
You will need to enter the following information in this section.
- Your Unique Drop Shipping API Key - (This is supplied when you apply for an account)
- Your Product Attribute Names - (Please read section below for more details)
- Your Customer Number - (This is supplied when you apply for an account)
At this point a lot of you are going to say: "Where is the product builder? So we can build and import product?"
Using a POD product builder is not much faster than just building your products yourself in Woocommerce. You have custom products and each product is going to different. You can't mass create individual designs that are all different with a one-click system.
1.
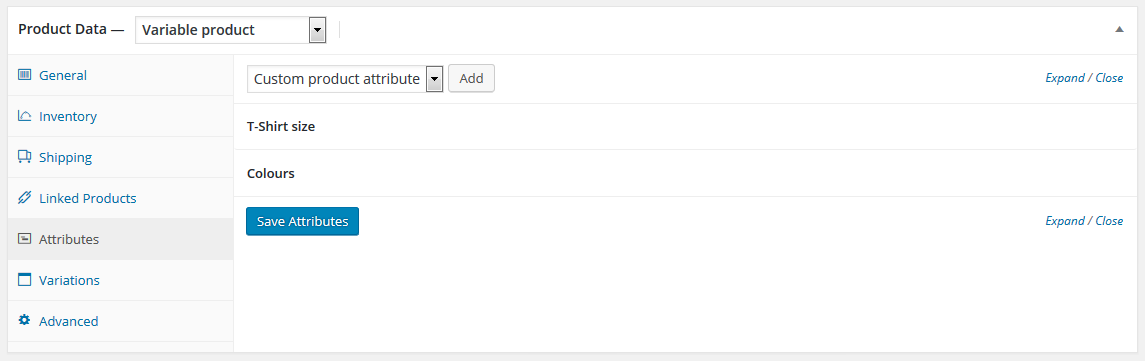
Product Attribute – When you create products in WooCommerce, you have the option to create a variable products with Attributes – (Which you will need, because t-shirts come in varying sizes and colours). We use these attribute names to find out what your customer has ordered. Find out how to add product attributes here?
Use these rules when you create products that you want us to drop ship.
Further reading: https://docs.woothemes.com/document/variable-product/
This is what it should look like when your finished.

They must be copied exactly including capitals and spacing. (see below)
Finally, enter your unique customer number - This is required to place and order through the dashboard - Create an Account here
Now your plugin is set up, its time to create some products and make them available for drop shipping.
3. Create your Products
If you want to know how to create a product using Woo-Commerce. The best documentation is here.
But before you get to this point, the first thing you need is the image of the product you plan to sell. We call it a mock up. This is made by combining your design with one of our products.
4. Enabling a Product for Drop Shipping
Pro Tip: You don't need to fill in the plugin's drop shipping custom fields right away. You could fill this section after you get an order for the product. That way you only fill this section IF a products sell.
OK, let see how this works.
When you create a product in Woo-Commerce, the plug-in will add a section within the product page, that looks like below.

The plug-in does not do anything unless the product is enabled for drop shipping.
To enable Drop shipping simply check the "Enabled Dropshipping" box, and the form now looks like this below.
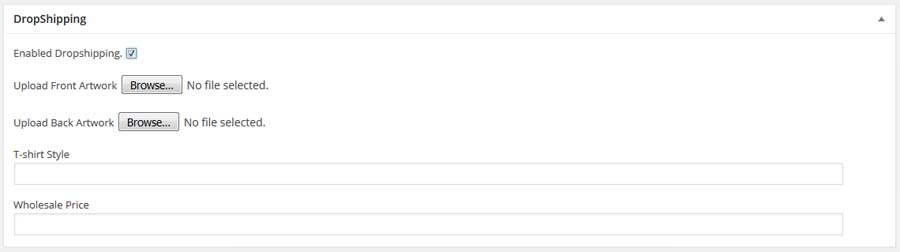
- Upload (Print Ready) Artwork to the front, back or both print positions
- Tell us the (Name of the Item) you want us to print your designs onto
- Enter the agreed (Wholesale) Price Excluding GST in the format 0.00 (This is NOT the price you charge your customers)
PS: File upload happens when you Publish, Save as Draft or Update your product
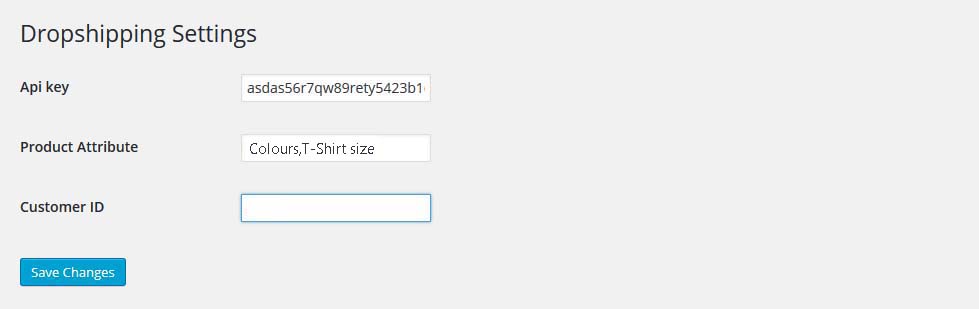
After successfully saving your settings, this is what your Drop Shipping Product setting might look like this below.

That's it!
You are now ready to sell t-shirts. You can continue to add and enable more products. All you need to do is repeat step 4.
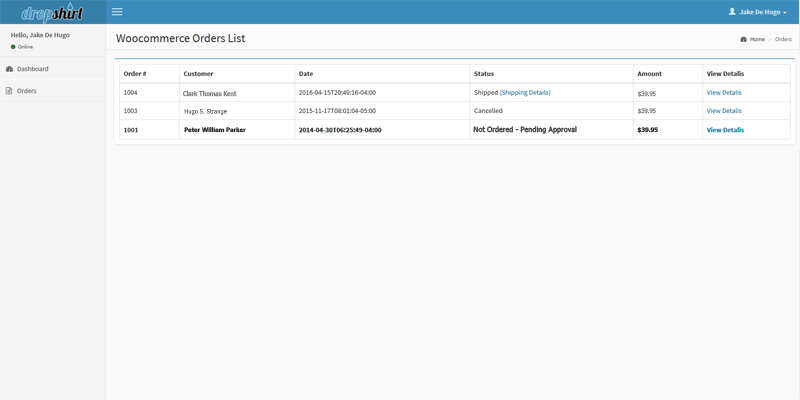
The DropShirt Dashboard
Approve pending orders and check your order status by logging into the Dropshirt.com.au Woo-Commerce Dashboard
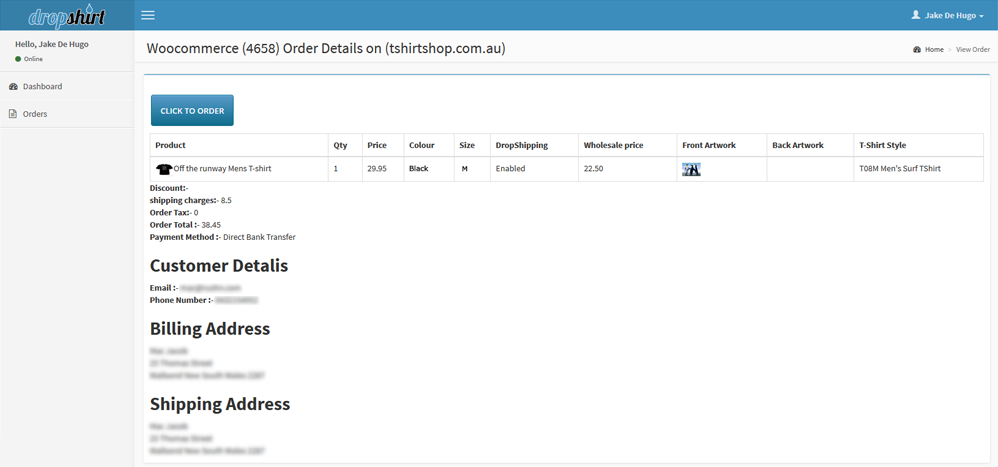
Click on the "CLICK TO ORDER" Button to send your order to our production centre. Done!
Sit back and relax while we print, pack and ship your order directly to your customer.
If you have any further queries regarding this document, please submit your questions using our contact form.